Key Takeaways
- The right power drill depends on honestly matching tool capabilities to your actual project needs as opposed to buying the most powerful option available.
- An 18- or 20-volt cordless combi drill delivers the most versatility for typical homeowners, handling everything from precision drilling to occasional masonry work.
- Investing in a battery platform with tool compatibility makes expanding your capabilities more affordable over time while reducing battery management complexity.
- Impact drivers and drill drivers serve different purposes, the impact driver excels at fastening while the drill driver provides precision for drilling and light fastening.
- Features like brushless motors, adjustable clutches, and variable speed genuinely improve performance and aren’t just marketing gimmicks.
- Your physical comfort using the tool matters as much as its specifications, a lighter drill you’ll actually use beats a powerful drill that stays in the garage because it’s unwieldy.
I remember standing in the tool aisle at Home Depot about eight years ago, completely overwhelmed by the wall of drills staring back at me. I’d just bought my first house, a 1970s fixer-upper that needed everything from new shelving to deck repairs, and I realized my sad little corded drill from college wasn’t going to cut it anymore.
There were drills in every color, size, and price point imaginable, and I honestly had no idea what half of them even did.
I ended up buying what the sales guy recommended, which turned out to be way more drill than I needed at the time. But that experience taught me something valuable: understanding what you actually need in a power drill can save you hundreds of dollars and a whole lot of frustration.
Why Your Drill Choice Matters More Than You Think
The right drill doesn’t just make your projects easier, it fundamentally changes what projects you’re even willing to attempt. I’ve watched friends avoid hanging heavy shelves or installing outdoor fixtures simply because they didn’t have confidence in their tools.
And honestly, I get it.
There’s nothing more defeating than struggling with an underpowered drill that can’t punch through a stud, or wrestling with a heavy-duty beast when all you needed was something nimble for cabinet hardware.
The drill market has exploded over the past decade with specialized tools for every conceivable application. Manufacturers have gotten really smart about segmenting their product lines, which means there’s genuinely a perfect drill out there for your specific situation.
But it also means you can easily end up with the wrong tool if you don’t understand what you’re looking at.
Understanding the Fundamental Split: Cordless vs. Corded
Before you even think about drill types or features, you need to decide whether you’re team cordless or team corded. This choice affects everything else downstream, and there’s no universally fix answer, it really depends on how you work.
I switched to cordless about six years ago and haven’t looked back, but I’ll be honest about the tradeoffs. Cordless drills give you incredible freedom of movement.
You’re not constantly repositioning extension cords or hunting for outlets, which sounds minor until you’re working on a deck or doing projects in multiple rooms.
The modern lithium-ion batteries have gotten so good that I rarely think about power anymore, even on bigger jobs.
But cordless drills do need you to become a battery manager. You need to remember to charge batteries the night before a project, and if you’re doing extended work, you’ll want backup batteries.
I learned this the hard way during a fence installation when my single battery died halfway through and I had to stop for three hours while it recharged. Now I keep two batteries in rotation, which solved that problem completely.
Corded drills deliver consistent power without any battery anxiety. They’re typically lighter than their cordless equivalents at the same power level because they’re not hauling around battery packs.
For workshop-based projects where you’re working in one spot, they’re actually really practical.
My father-in-law still swears by his corded drill for his woodworking projects, and I can’t argue with his logic, he’s never once had to stop mid-project for a dead battery.
The amperage rating tells you what a corded drill can handle. For most home projects like drilling pilot holes, assembling furniture, or mixing paint, a 7- to 8-amp drill gives you plenty of muscle.
When you start getting into masonry work or need to bore large holes through dimensional lumber, you’ll want 10 amps or higher.
These heavier-duty corded models really shine for repetitive drilling tasks where a cordless drill would drain batteries quickly.
Decoding Drill Types and Their Real-World Applications
The variety of drill types available now is genuinely impressive, but it can make selection confusing. Let me break down what each type actually excels at, based on projects I’ve used them for.
Standard Drill Drivers
The basic drill driver is probably what most people picture when they think “power drill.” These tools are designed primarily for boring clean holes and driving screws with control. What makes them special is the adjustable clutch, which let’s you dial in exactly how much torque gets delivered to the fastener.
I use my drill driver for probably 70% of my projects, mounting TV brackets, assembling furniture, installing door hardware, drilling holes for cable runs. The clutch settings are genuinely useful once you understand them.
Lower numbers give you less torque, which prevents you from stripping screw heads in soft materials like pine or MDF.
Higher numbers deliver more power for driving into hardwoods or through thick materials.
The variable speed trigger gives you fine control too. Squeeze gently for slow, precise starting, then ramp up as the screw bites.
This matters more than you’d think for preventing bit wander or splitting wood near edges.
Hammer Drills
Hammer drills add a percussive hammering action to the standard rotation, which makes them vastly better at drilling into masonry. The mechanism literally pounds the bit forward while it spins, essentially chipping away at concrete or brick instead of just grinding through it.
I bought a hammer drill specifically for a basement renovation project that required dozens of holes in concrete foundation walls for mounting furring strips. My regular drill driver would heat up and struggle through each hole, taking maybe two minutes per hole and wearing out bits quickly.
The hammer drill punched through the same concrete in about 15 seconds per hole, and the bits lasted probably five times longer.
Most modern hammer drills let you switch the hammering action on and off, which makes them versatile. When you’re not drilling masonry, you just flip it to standard drill mode and use it like a regular drill driver.
This dual functionality makes hammer drills really popular for home use, you get two tools in one package.
Combi Drills
Combi drills are essentially hammer drills with robust drill driver capabilities, marketed under a different name depending on the manufacturer. They handle the widest variety of materials, wood, metal, plastic, masonry, tile, which is why they’ve become such a staple for homeowners who want one drill that does everything reasonably well.
I actually think combi drills represent the sweet spot for most people who aren’t professional contractors. You get enough power for serious projects, the hammer function for occasional masonry work, and the precision controls for delicate tasks.
They typically come with good clutch systems and variable speed, making them genuinely capable all-around tools.
Impact Drivers
Impact drivers confused me for years because they look superficially similar to drill drivers but work completely differently. Instead of smooth, continuous rotation, impact drivers deliver rotational strikes up to 50 times per second.
It’s like combining a drill with a tiny impact wrench.
This mechanism gives impact drivers two major advantages. First, they deliver significantly more torque without requiring you to press hard on the tool, which reduces wrist strain dramatically.
Second, the hammering action prevents the bit from camming out (slipping out of the screw head), which means fewer stripped screws.
I really started appreciating my impact driver when I built a large deck. Driving hundreds of 3-inch deck screws into pressure-treated lumber would have been genuinely exhausting with a drill driver.
The impact driver just powered through them efficiently, even into the dense wood near knots.
Your neighbors might not love the distinctive rattling sound that impact drivers make, but your wrists will thank you.
The limitation with impact drivers is that they accept only hex shank bits, and they’re not ideal for precise drilling. The hammering action makes it harder to drill clean holes in delicate materials.
Think of impact drivers as specialized fastening tools as opposed to general-purpose drills.
Rotary Hammers
Rotary hammers are the big brothers of hammer drills, with a much more robust hammering mechanism. These are legitimately heavy-duty tools designed for drilling into the hardest materials, concrete, stone, asphalt, thick brick walls.
They use SDS chuck systems that lock bits in place more securely and deliver substantially more impact energy.
I’ve only rented rotary hammers for specific projects, like installing a French drain that required drilling through an 8-inch concrete footer. These tools are powerful enough that you really feel the difference, what would take minutes with a hammer drill takes seconds with a rotary hammer.
Many models offer dedicated modes for hammer-only operation (essentially turning them into light demolition tools) and rotation-only drilling.
Unless you’re regularly working with concrete or stone, a rotary hammer is probably more tool than you need. They’re heavier, more expensive, and genuinely tiring to use for extended periods. But for the right applications, nothing else comes close.
Drill Presses
Drill presses occupy their own category because they’re stationary workshop tools as opposed to handheld drills. The major advantage is precision, you can drill perfectly perpendicular holes at exact depths repeatedly, which is essential for metalworking, furniture making, and woodworking projects that demand accuracy.
I added a benchtop drill press to my workshop after repeatedly struggling to drill straight holes for dowel joinery. The difference is honestly night and day when you need accuracy.
You can also safely drill materials that would be dangerous with a handheld drill, and the adjustable speed settings let you match the RPM to specific materials and bit sizes.
Voltage Ratings and What They Mean
The voltage rating on cordless drills causes endless confusion, partly because manufacturers have muddied the waters with their marketing. Here’s what you actually need to know.
Twelve-volt drills are genuinely adequate for light-duty work, assembling flat-pack furniture, hanging pictures, basic home repairs, changing light fixtures. They’re compact and lightweight, which makes them comfortable for extended use and easy to maneuver in tight spaces.
I keep a 12-volt drill in my kitchen tool drawer for quick tasks because it’s not intimidating or unwieldy.
Eighteen- and 20-volt drills represent the mainstream sweet spot for homeowners. Here’s where it gets weird: 20V Max and 18V tools are actually the same thing.
The 20 volts refers to peak voltage when the battery is fully charged, while 18 volts is the nominal operating voltage.
It’s purely a marketing distinction, the batteries are identical. These tools handle the large majority of home projects comfortably, from installing window treatments to building furniture to drilling into studs.
Twenty-four-volt drills deliver noticeably more power and run longer between charges. I upgraded to a 24-volt system when I started taking on larger projects like deck building and extensive outdoor carpentry.
The extra power really shows up when you’re drilling into dense hardwoods or driving large fasteners into treated lumber.
These drills are definitely heavier, though, so there’s a real tradeoff between power and comfort.
Chuck Size and Capability
The chuck is the part that holds the drill bit, and its size decides what bits you can use. Most people don’t think much about chuck size until they buy a bit that won’t fit, which happened to me with a large spade bit that wouldn’t fit my 3/8-inch chuck.
Quarter-inch chucks show up on compact drills and impact drivers. They’re fine for small bits and standard fastening work, but you’re limited in what accessories you can use.
Three-eighths-inch chucks hit the versatility sweet spot, they accept most common bits while keeping the drill reasonably compact.
Half-inch chucks let you use larger bits for boring big holes, which matters for plumbing and electrical work where you’re drilling through multiple studs.
Virtually all modern cordless drills feature keyless chucks, which you tighten by hand. This is infinitely more convenient than the old keyed chucks that required a separate tool.
Make sure to really tighten the chuck firmly, hand-tight, then another quarter turn, to prevent bits from slipping during use.
Speed, Torque, and Clutch Settings Explained
Variable speed control gives you remarkable versatility in a single tool. Lower speeds with higher torque work better for harder materials, you want that grinding power to push through metal or masonry.
Higher speeds with less torque suit softer materials like pine or drywall, where speed matters more than force.
Most quality drills offer two or three speed ranges. I typically use the lower speed range for driving screws and drilling into metal or hardwoods, and switch to high speed for drilling into softwoods or working with smaller bits.
The speed ranges are optimized for different tasks, so using the right range genuinely improves performance.
The adjustable clutch is probably the most underutilized feature on drill drivers. Those numbered settings around the chuck control how much torque reaches the fastener before the clutch disengages.
Start with lower numbers when driving screws into soft or delicate materials, then increase if the clutch keeps slipping.
This feature has saved me from countless stripped screws and split boards.
Battery Technology and Compatibility
Modern lithium-ion batteries have transformed cordless tools. They hold charges for months, don’t develop memory issues like old nickel-cadmium batteries, and deliver consistent power until they’re depleted as opposed to gradually fading.
The really smart move is choosing a tool platform where batteries work across multiple tools. I’m invested in the Milwaukee M18 system, which means my drill, impact driver, circular saw, and reciprocating saw all share the same batteries.
This interchangeability is incredibly practical, I can redistribute batteries based on what I’m using, and I don’t need separate chargers for every tool.
Battery capacity gets measured in amp-hours (Ah). Higher numbers mean longer runtime.
I use 2.0Ah batteries for light work where weight matters, and 5.0Ah batteries for extended projects.
Having batteries in different capacities gives you options based on the specific job.
Features That Make a Difference
Brushless motors represent a legitimate technological improvement over traditional brushed motors. They’re more efficient, which translates to longer battery life and more power from the same battery.
They also last longer because there are no carbon brushes wearing out.
The cost premium has shrunk enough that brushless is worth seeking out if you’re buying a quality drill.
Built-in LED lights seem like a gimmick until you’re working inside a cabinet or in a dim basement. The light illuminates exactly where you’re drilling, which improves accuracy and safety.
This feature shows up even on budget drills now, and it’s genuinely useful.
Belt clips and bit storage might sound minor, but they affect usability. A good belt clip keeps the drill accessible when you’re moving around a job site or working on a ladder.
Some drills include bit storage in the handle, which is handy but usually limited to a few bits.
Matching Drills to Materials
Different materials really do demand different approaches, and using the wrong drill type makes projects unnecessarily difficult.
For wood projects, standard drill drivers work beautifully for smaller work like cabinet making or trim carpentry. When you’re building structures like decks or framing, an impact driver becomes invaluable for driving the volume of fasteners involved. The key with wood is matching your speed and clutch settings, too aggressive and you’ll split boards, too gentle and you’ll labor unnecessarily.
Metal drilling requires slower speeds and sharp bits designed specifically for metal. I use my drill driver for thin metal like ductwork or electrical boxes, but when drilling through thicker steel, an impact driver’s extra torque helps push through without bogging down.
Always use cutting fluid or oil when drilling metal, it dramatically extends bit life and improves hole quality.
Concrete and masonry absolutely need either a hammer drill or rotary hammer, depending on the scale of work. Standard drills will eventually get through concrete, but you’ll wear out the drill and your patience long before finishing.
The hammering action makes an enormous difference.
Tile and glass demand careful speed control and specialized bits. The combi drill’s versatility shines here because you can start slowly to prevent skating across the slick surface, then gradually increase speed once the bit bites.
Use constant, gentle pressure as opposed to forcing the bit.
Making the Right Choice for Your Situation
If you’re primarily doing home maintenance and DIY projects, an 18- or 20-volt cordless combi drill gives you the most flexibility. You get enough power for serious tasks, the precision for delicate work, and occasional masonry capability.
This is genuinely the one-drill solution for most homeowners.
For dedicated woodworking or furniture building, a quality drill driver paired with a drill press covers most needs. The drill driver handles assembly and hardware installation, while the press delivers the precision for joinery and metalworking.
Professional contractors or serious DIYers doing heavy construction benefit from a two-tool approach: an 18- to 24-volt drill driver for holes and precision work, plus an impact driver for fastening. This combination handles the full range of construction tasks efficiently without compromising on either capability.
Light-duty users who mainly assemble furniture and handle basic home repairs should seriously consider a 12-volt drill. The compact size and light weight make it far less intimidating and easier to control, which actually improves results for less experienced users.
Brand Considerations and Platform Thinking
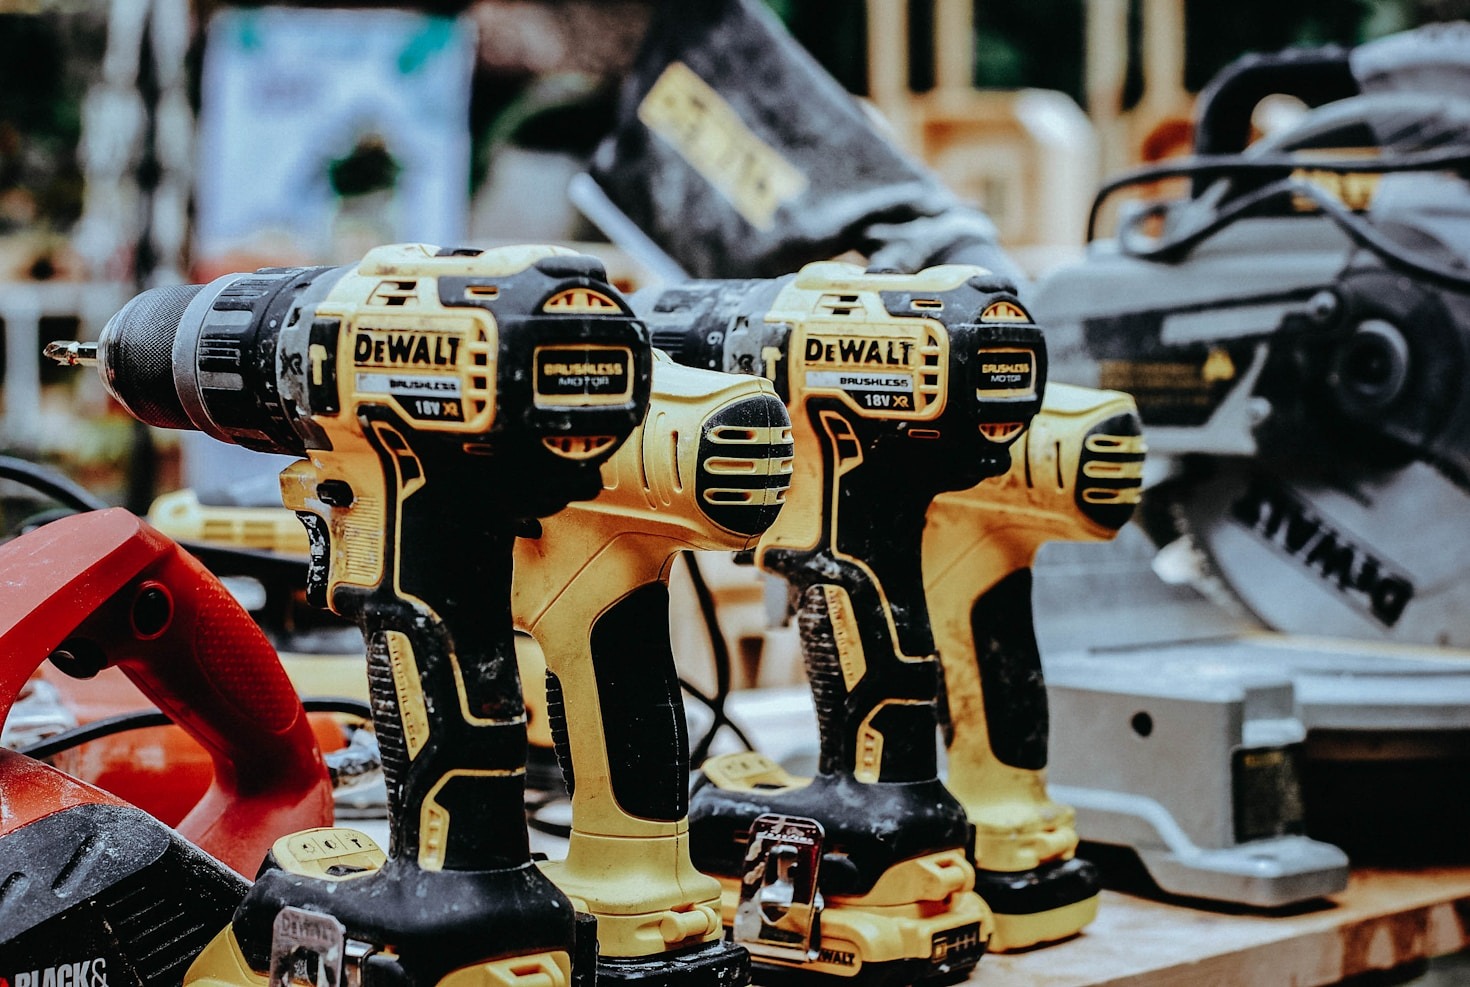
Tool brand choice matters more than it used to because you’re not just buying a drill, you’re potentially investing in an entire tool ecosystem. DeWalt has earned its reputation for job site durability.
Their tools withstand the abuse of professional use, which means they’re definitely overbuilt for home use, but that translates to longevity.
Makita tools consistently impress with their ergonomics and battery technology. They tend to be lighter and more comfortable for extended use than competitors at similar power levels.
Milwaukee’s M18 Fuel line delivers exceptional power without sacrificing runtime.
The brushless motors in the Fuel series genuinely perform better than previous generations.
Ryobi occupies an interesting position as a consumer-focused brand with an enormous tool selection. Their drills might not match DeWalt’s durability, but they’re entirely adequate for home use at significantly lower prices.
The massive tool selection in their 18V One+ system means you can eventually add specialized tools without buying into a new battery platform.
Common Mistakes to Avoid
The biggest mistake I see people make is buying too much drill for their actual needs. That 24-volt beast is impressive, but if you’re mainly hanging pictures and assembling furniture, you’ve paid for power you’ll never use while dealing with unnecessary weight and bulk.
Conversely, cheaping out on batteries is false economy. Spending an extra $50 for a higher-capacity battery or buying a two-battery kit changes your cordless drill experience.
Dead batteries kill productivity and enthusiasm for projects.
Ignoring ergonomics costs you over time. Pick up the drill in the store and really hold it like you’re using it.
Does it balance well?
Is the trigger comfortable? Can you easily reach the direction switch?
These factors matter more during actual use than specifications on paper.
Failing to maintain your drill shortens its life unnecessarily. Keep the chuck clean, occasionally oil the mechanism, and store batteries partially charged as opposed to completely dead.
These simple habits extend tool life significantly.
People Also Asked
What is the difference between a drill driver and an impact driver?
A drill driver rotates smoothly and includes an adjustable clutch for controlled fastening and precise drilling. An impact driver delivers rotational strikes up to 50 times per second, providing significantly more torque for driving fasteners but less control for delicate drilling work.
Impact drivers excel at heavy-duty fastening like deck screws into treated lumber, while drill drivers offer better versatility for drilling holes in various materials.
Can you drill into concrete with a regular drill?
Yes, but it’s extremely slow and wears out both the drill and bits quickly. A standard drill driver lacks the hammering action needed to efficiently chip through concrete.
For occasional small holes, you can technically use a regular drill with masonry bits, but you’ll spend several minutes per hole.
A hammer drill reduces concrete drilling time to seconds instead of minutes and preserves your equipment.
How many volts do I need for a cordless drill?
For most homeowners doing typical DIY projects like furniture assembly, hanging shelves, and basic repairs, an 18- or 20-volt drill provides plenty of power. Light-duty users mainly assembling furniture can work comfortably with 12-volt drills.
If you’re building decks, doing extensive construction work, or regularly drilling into hardwoods and dense materials, consider upgrading to 24-volt systems for the extra power and longer battery runtime.
What does the clutch do on a drill?
The clutch controls how much torque reaches the fastener before the drill stops applying force. Lower clutch settings prevent overdriving screws into soft materials like pine or MDF, which causes stripped screw heads and split wood.
Higher settings allow more torque for driving into harder materials.
Using the suitable clutch setting dramatically reduces frustration and improves results when assembling projects or installing hardware.
Are brushless drills worth the extra cost?
Yes, brushless motors deliver genuinely better performance than brushed motors. They run more efficiently, which means longer battery life and more power from the same battery capacity.
Brushless motors also last longer because there are no carbon brushes wearing out over time.
The price difference between brushed and brushless drills has narrowed enough that the upgrade makes sense if you’re buying a quality drill you’ll use regularly.
Should I buy a drill with one battery or two?
Always buy a two-battery kit if possible. Having a backup battery charging while you work eliminates the frustration of stopping mid-project to wait for a recharge.
This matters especially for larger projects that drain batteries quickly.
The incremental cost of a second battery when purchased as a kit is much less than buying one separately later, and the convenience genuinely changes how you approach projects.